Introducing framed (wrapped canvas) prints from the
"Abstract Chic" collection by C.7 Design Studio. These unique pieces
of original art will work well as stunning centerpiece complementing your new
décor ideas, or as perfect accent for your already established interior. Being
a perfect marriage of color harmony and flow of shape, this artwork will match
and surpass the latest trends in interior design. The artwork also incorporates
my M-LETT 2.5D technique.
All
the prints are available in various sizes, including “colossal” prints up to
50”x50”, on a variety of premium canvasses. Custom frames and variety of high
quality archival paper are also available. Zazzle's gloss canvas is made from a
tight weave, acid-free cotton-poly blend canvas ideal for photography or art.
Printed with a special ink-receptive coating, your wrapped canvas print will be
fade-resistant for 75 years. All the prints presented here are available for purchase from my
"Prints" gallery on Zazzle.
Pop art? Not quite... Rather - the art of making things pop... Introducing unique and visually stunning fine art pieces by Serge Averbukh (C.7 Design Studio).Toronto-based artist/designer/illustrator, specializing primarily in heraldry, yet constantly and passionately creating in various media such as digital art, photography and mixed media arts.
Wednesday, January 23, 2013
Saturday, November 3, 2012
Anubis & Nut
One of the ongoing projects, which is heavily influenced by my MLETT-3D method is “Sacred Symbols 3D” Collection. Today I am introducing a series of unique framed prints, featuring
Egyptian goddess Nut, alternatively spelled Nuit, Newet, and Neuth – The Sky
Goddess, and Egyptian jackal-headed god Anubis, also known as Inpu, Anup, Anpu, and
Ienpw.
Nut was the goddess of the sky and all heavenly bodies, a symbol of
protecting the dead when they enter the afterlife. According to the Egyptians,
during the day, the heavenly bodies—such as the sun and moon—would make their
way across her body. Then, at dusk, they would be swallowed, pass through her
belly during the night, and be reborn at dawn.Nut is also the barrier separating the forces of chaos from
the ordered cosmos in the world. Because of her role in saving Osiris, Nut was
seen as a friend and protector of the dead.
Anubis was associated with the mummification and protection
of the dead for their journey into the afterlife. One of the roles of Anubis was
"Guardian of the Scales". Deciding the weight of "truth" by
weighing the Heart against Ma'at, who was often depicted as an ostrich feather,
Anubis dictated the fate of souls. In this manner, he was a Lord of the
Underworld, only usurped by Osiris. All the prints presented here, as well as a variety of custom products with this design are available for purchase from my "Sacred Symbols" galleries on Zazzle.
Labels:
Anpu,
Anubis,
Anup,
c7 3D hi res framed prints,
c7 design gifts,
c7 sacred symbols 3D,
Egyptian amulets,
Ienpw,
Inpu,
jackal god,
Lord of the Underworld,
Neuth,
Newet,
Nuit,
Nut,
sky goddess,
symbol of afterlife
Saturday, September 29, 2012
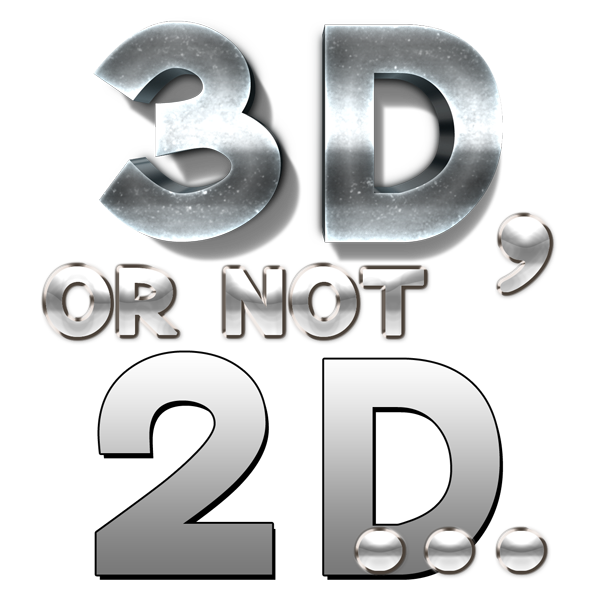
3D, or not 2D?

And then it suddenly dawned on me: what if, somehow, I was
able to create a new graphic realm, sort of a love child born out of an
unorthodox union of 2D-father and 3D-mother (WOW!), utilizing the best of
both worlds? In technical terms, it would possess simplicity, portability and
light-weightiness of 2D, at the same time, having stunning look, feel and
texture of 3D… Is it even possible, one would ask? Well, I wasn't really sure
at the time, but I thought I'd give it a try.


After some research, I have discovered that a few terms somewhat describing this type of imaging technology have already been coined. 2.5D ("two-and-a-half-dimensional"), 3/4 perspective and pseudo-3D are terms, used mainly in the video game industry to describe among other things, a 2D graphical projections and similar techniques, which are used to cause a series of images (or scenes) to simulate the appearance of being three-dimensional (3D) when in fact they are not, or gameplay in an otherwise three-dimensional video game that is restricted to a two-dimensional plane.

What also helped me a lot on this path of discovery is the fact that I did not have any formal education in the area of graphic design. Zero. Then, quite a while ago, I discovered Adobe Photoshop, and fell in love at first sight. My teachers were renowned Photoshop gurus such as Bert Monroy, always encouraging playing, experiment and working "out of the box". Versatility and virtually unlimited possibilities of Photoshop, combined with my curiosity and strong knack for experimentation, resulted in what I later called M-LETT 3D (or M-LETT 2.5D, in its latest incarnation) method (short for "Multi-Layer Enhancement & Texturing Technique").


After some research, I have discovered that a few terms somewhat describing this type of imaging technology have already been coined. 2.5D ("two-and-a-half-dimensional"), 3/4 perspective and pseudo-3D are terms, used mainly in the video game industry to describe among other things, a 2D graphical projections and similar techniques, which are used to cause a series of images (or scenes) to simulate the appearance of being three-dimensional (3D) when in fact they are not, or gameplay in an otherwise three-dimensional video game that is restricted to a two-dimensional plane.

What also helped me a lot on this path of discovery is the fact that I did not have any formal education in the area of graphic design. Zero. Then, quite a while ago, I discovered Adobe Photoshop, and fell in love at first sight. My teachers were renowned Photoshop gurus such as Bert Monroy, always encouraging playing, experiment and working "out of the box". Versatility and virtually unlimited possibilities of Photoshop, combined with my curiosity and strong knack for experimentation, resulted in what I later called M-LETT 3D (or M-LETT 2.5D, in its latest incarnation) method (short for "Multi-Layer Enhancement & Texturing Technique").
The idea was fairly simple. I asked myself: what makes
things look 3-dimensional and realistic? Technically speaking, just a few
components: perspective, light/shadow and texture. So, how would you make
things pop without employing actual 3D-rendering technology (a process of
automatically converting 3D wire frame models into 2D images with 3D
photorealistic effects or non-photorealistic rendering on a computer)?
Basically, how would you fake 3D? Photoshop already had almost everything I
needed in its arsenal, and the best possible solution was to utilize the
amazing and powerful set of features called ”layer styles". Now all
I needed was to assemble a toolkit appropriate for the task, as well as some
innovative ways of using it. Another important part of the equation was
to incorporate various textures, such as various metals, enamels, precious
stones, leathers and fabrics into my toolbox.
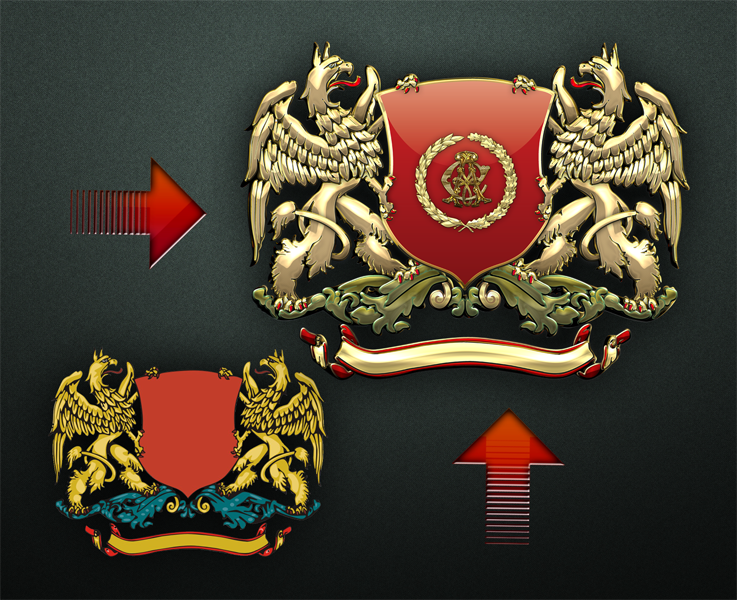
So, how is it actually done? In a nutshell, here
is how… You start with a regular flat two-dimensional image. I normally create
it in a form of a vector image in Adobe Illustrator, or use a pre-existing
vector or raster image, which I then vectorize. Next step is sort of a
reverse-engineering process of the said 2D image, performed in Photoshop. I literally
disassemble the base 2D image into multiple layers, positioning them as they
would appear if it was a three-dimensional object. Every little detail counts.
You may not even acknowledge it, but your brain will. As soon as all the layers
are stacked up and ready, each layer and each detail would get its
individual style-texture-shadow/light treatment. All elements come together in
a final draft, which pops and comes to life in a very visually-impressive and
an unusual way. All my images are results of a very detailed and time-consuming
process. And the process turned out to be a never ending work-in-progress
to this day. I have to admit though -- it's a lot of fun...
At this point, my
lifelong interest in heraldry and insignia came into play. I realized that my
task would be more feasible when dealing with generally flat objects with
moderately-raised reliefs, such as coins, pins or various insignia. While
researching the topic, I noticed how flat and plain the majority of such
imagery used by webmasters, in print
production and manufacturing were . A
new idea started boiling alongside my Photoshop quest. What if I combine my
newly-born "fake 3D" method with the idea of enhancing various
heraldry and insignia objects, bringing them to life, so to speak, making them
stand out and look realistic? This is how some of my major-scale projects ,
such as "Military Insignia 3D", "World heraldry 3D" and
"Sacred Symbols 3D" were born.
I am following those in detail on my other blogs, as well as on my
"Heraldry Workshop" blog. This
particular blog will simply be a showcase of my artwork and ever-evolving
M-LETT 3D method, not covered on my other blogs. Welcome to the new realm of 3D that is not
really a 3D, or, if you wish, a 2D, which doesn't look like it normally
would... Hopefully, together we can
answer the question: 3D or not 2D?
Subscribe to:
Posts (Atom)